
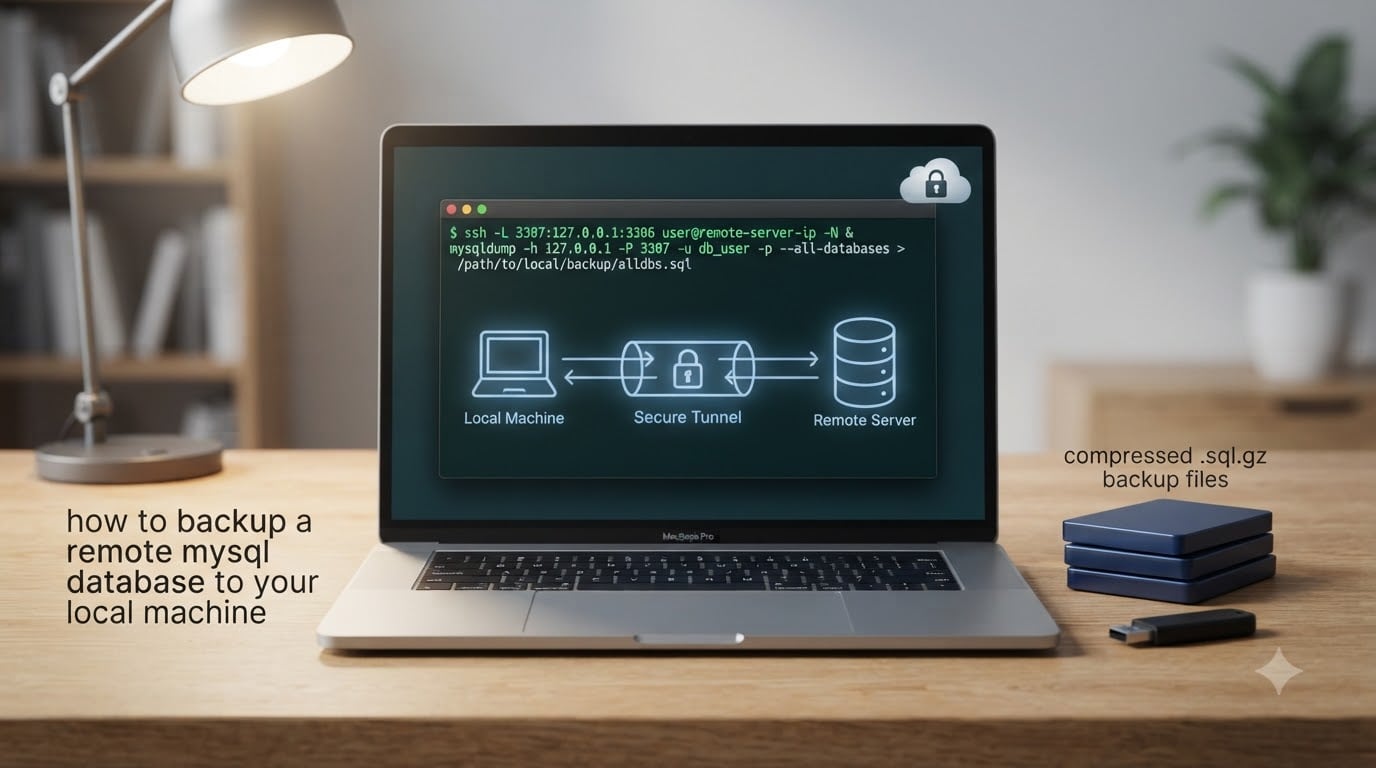
If you run a MySQL or MariaDB database on a remote server, you already know the file on the host is not a real backup until you can hold it somewhere else. That is why so many developers, sysadmins, and WordPress site owners want a clean, repeatable way to backup a remote MySQL database to your local machine.
This guide walks you through the three methods our team uses in production: a direct mysqldump with the -h flag, an SSH tunnel for when port 3306 is closed, and phpMyAdmin for the times you have no shell access at all. You will get copy-paste commands for Linux, macOS, and Windows PowerShell, plus an automation script you can drop into cron tonight.
Table of Contents
What You’ll Learn
- What you need before you start
- mysqldump vs SSH tunnel vs phpMyAdmin: which method fits your situation
- Method 1: mysqldump directly to your local machine with the -h flag
- Method 2: mysqldump over an SSH tunnel (the safest method)
- Method 3: Export a remote database through phpMyAdmin
- How to restore the .sql file to your local MySQL
- Backup verification – how to prove the dump actually restores
- Automating remote MySQL backups with cron and Task Scheduler
- Large database strategies (10 GB and beyond)
- Troubleshooting common errors
- Frequently asked questions
What You Need Before You Start
You need three things before you can backup a remote MySQL database to your local machine: a MySQL user with read access on the target database, the host’s name or IP and port, and a local machine that can reach that host on the MySQL port (or on SSH).
Remote Access Requirements
Your remote MySQL server must allow your IP to connect. Ask your hosting provider or check /etc/mysql/mysql.conf.d/mysqld.cnf for bind-address and mysql.user in MySQL itself for the user host patterns. The MySQL user you dump with needs at minimum the SELECT privilege on every table you want to back up, plus LOCK TABLES if you are not using --single-transaction and your tables are not InnoDB.
Confirm the user exists and the host is allowed with this command from any machine that already has the MySQL client:
# Test connectivity first - saves a lot of guessing later
mysql -h db.example.com -P 3306 -u backup_user -p -e "SHOW DATABASES;"
If you see ERROR 1045 (28000): Access denied for user, the user is missing or the password is wrong. If you see ERROR 2003 (HY000): Can't connect to MySQL server, the host is unreachable on that port – usually because the firewall is closed, and that is exactly when you want an SSH tunnel (covered in Method 2).
Local Tools You Need
On your local machine you only need the mysqldump client and (for Method 2) an OpenSSH client. Both ship by default on macOS and most Linux distributions. On Windows 10 and 11, install them with:
# Windows 10/11: install MySQL client and OpenSSH client
winget install Oracle.MySQL
Add-WindowsCapability -Online -Name OpenSSH.Client~~~~0.0.1.0
Confirm the tools work by running mysqldump --version and ssh -V. If either command is not recognized, fix that first – every method below assumes both are available.
A Quick Note on Security
Never expose MySQL’s port 3306 to the public internet. Botnets scan for open MySQL ports constantly, and a single weak password is enough to lose the whole server. The safest setup is to firewall port 3306 to localhost on the remote server and rely on SSH for every backup. If you must connect directly, the MySQL user should require TLS with REQUIRE SSL in its CREATE USER statement.
mysqldump vs SSH Tunnel vs phpMyAdmin: Which Method Should You Use?
Pick the SSH tunnel method unless you have a specific reason not to. It is the most secure, the most reliable, and the only one that works when port 3306 is closed. Use direct mysqldump only when SSH is not available and you have TLS in place. Use phpMyAdmin only when you have no shell access at all – common on managed WordPress hosts.
| Method | Setup effort | Security | Performance | Best for |
|---|---|---|---|---|
| mysqldump direct (-h) | Lowest – one command | Medium – traffic in cleartext unless TLS | Fast on local networks | Servers you control with TLS configured |
| mysqldump over SSH tunnel | Medium – set up the tunnel once | Highest – everything inside SSH | Fast, easy to script | Production servers and any host you SSH into |
| phpMyAdmin export | Lowest – click through a UI | Depends on the host | Slow on multi-GB databases | Managed WordPress hosts with no shell access |
Method 1: Use mysqldump Directly With the -h Flag
mysqldump is a built-in MySQL command-line utility that creates a logical backup by writing the SQL statements needed to recreate one or more databases. Run from your local machine, it connects to the remote server over TCP using -h for the host and -P for the port, and streams the dump straight into a file on your laptop.
Single-Database Dump
The most common case: dump one database from the remote host to a local file. Replace db.example.com, backup_user, and myapp_prod with your real values. You will be prompted for the password.
# Dump one database from a remote host to a local .sql file
mysqldump
  -h db.example.com
  -P 3306
  -u backup_user
  -p
  --single-transaction
  --routines
  --triggers
  myapp_prod
  > ~/backups/myapp_prod_$(date +%Y-%m-%d_%H%M).sql
The --single-transaction flag is the InnoDB best practice – it takes a consistent snapshot at the start of the dump without locking tables, so live writes keep flowing. --routines and --triggers make sure stored procedures and triggers come along for the ride.
Multiple Databases and –all-databases
To dump two specific databases, list them after the flags and use --databases so the dump includes CREATE DATABASE and USE statements:
# Dump multiple named databases in one file
mysqldump -h db.example.com -P 3306 -u backup_user -p
  --single-transaction --routines --triggers
  --databases myapp_prod myapp_analytics
  > ~/backups/multi_$(date +%F).sql

# Dump every database on the server
mysqldump -h db.example.com -P 3306 -u backup_user -p
  --single-transaction --routines --triggers --events
  --all-databases
  > ~/backups/all_dbs_$(date +%F).sql
On-the-Fly gzip Compression
Raw SQL dumps compress extremely well (often 5x to 10x). Pipe mysqldump straight through gzip -9 instead of writing an intermediate file:
# Compress on the fly - no intermediate .sql file needed
mysqldump -h db.example.com -P 3306 -u backup_user -p
  --single-transaction myapp_prod
  | gzip -9 > ~/backups/myapp_prod_$(date +%F).sql.gz

# Restore the compressed file
gunzip -c ~/backups/myapp_prod_2026-09-11.sql.gz | mysql -u root -p myapp_local
This single-line pattern is what r/sysadmin and r/linuxadmin users reach for in cron jobs – it keeps disk usage low and cuts the bandwidth the dump burns through.
Method 2: Backup Through an SSH Tunnel
An SSH tunnel forwards a local port on your machine to a port on the remote server through an encrypted SSH connection. When port 3306 is firewalled, this is how you reach the database. You open the tunnel, then point mysqldump at localhost as if the remote server were running on your laptop.
Set Up the Tunnel Interactively
This is the fastest way to test the connection. Open a terminal and run:
# Forward local port 3307 to remote port 3306 over SSH
ssh -L 3307:127.0.0.1:3306 [email protected] -N
The flags do three things: -L 3307:127.0.0.1:3306 opens local port 3307 and forwards it to localhost:3306 on the remote side, [email protected] is your SSH login, and -N tells SSH not to start a remote shell. Leave this terminal open – the tunnel lives as long as the SSH session does.
Now from a second terminal, dump the remote database through the tunnel:
# mysqldump connects to localhost:3307, which SSH forwards to the remote
mysqldump -h 127.0.0.1 -P 3307 -u backup_user -p
  --single-transaction myapp_prod
  | gzip -9 > ~/backups/myapp_prod_tunnel_$(date +%F).sql.gz
Set Up the Tunnel via SSH Config
When you run this every night, opening the tunnel by hand gets old. Add a host block to ~/.ssh/config so a one-word command does it all:
# ~/.ssh/config
Host db-tunnel
    HostName db.example.com
    User backup_user
    LocalForward 3307 127.0.0.1:3306
    ServerAliveInterval 60
    IdentityFile ~/.ssh/id_ed25519
Now you can open the tunnel in the background with ssh -f -N db-tunnel (the -f forks SSH into the background), and mysqldump against 127.0.0.1:3307 just works.
SSH Key-Based Authentication for Unattended Dumps
If you want cron to run your backup without a password prompt, you must use SSH keys. Passwords cannot be piped into ssh cleanly, and the SSHPASS workaround is fragile. Generate a keypair on your local machine and copy the public key to the server:
# Generate a dedicated backup key (no passphrase for cron)
ssh-keygen -t ed25519 -f ~/.ssh/backup_key -N ""

# Install the public key on the remote server
ssh-copy-id -i ~/.ssh/backup_key.pub [email protected]

# Test the key login
ssh -i ~/.ssh/backup_key [email protected] echo "key works"
Then point the SSH config block above at IdentityFile ~/.ssh/backup_key. From this point on, cron can run your backup script with no human in the loop.
All-in-One Script: Tunnel + Dump + Gzip + Timestamp
Save this as ~/bin/backup_remote_mysql.sh, chmod +x it, and you have a one-command production backup. The script opens the tunnel, dumps the database, compresses the output, and tears the tunnel down – even if the dump fails.
#!/usr/bin/env bash
# Backup a remote MySQL database to your local machine via SSH tunnel
set -euo pipefail

REMOTE_HOST="[email protected]"
LOCAL_PORT=3307
DB_NAME="myapp_prod"
DB_USER="backup_user"
BACKUP_DIR="$HOME/backups"
TIMESTAMP=$(date +%Y-%m-%d_%H%M%S)

mkdir -p "$BACKUP_DIR"

# Open the tunnel in the background; -f forks, -N no remote command
ssh -f -N -L "${LOCAL_PORT}:127.0.0.1:3306" "$REMOTE_HOST"

# Make sure the tunnel is closed even if mysqldump fails
cleanup() { ssh -O exit "$REMOTE_HOST" 2>/dev/null || true; }
trap cleanup EXIT

# Give the tunnel a moment to come up
sleep 1

# Dump through the tunnel, compress on the fly
mysqldump -h 127.0.0.1 -P "$LOCAL_PORT" -u "$DB_USER" -p
  --single-transaction --routines --triggers
  "$DB_NAME" | gzip -9 > "$BACKUP_DIR/${DB_NAME}_${TIMESTAMP}.sql.gz"

echo "Wrote $BACKUP_DIR/${DB_NAME}_${TIMESTAMP}.sql.gz"
This is the pattern our team uses nightly – it works for any database you have SSH access to, and the timestamped filename means old dumps never get overwritten.
Method 3: Back Up a Remote MySQL Using phpMyAdmin
phpMyAdmin is the right tool when your host gives you a web UI but no shell access – common on managed WordPress hosts like Kinsta, WP Engine, or any cPanel server. You cannot run mysqldump in this situation, so you click through the export wizard.
Step-by-Step phpMyAdmin Export
- Log in to your hosting control panel and open phpMyAdmin.
- Select the database you want to back up from the left sidebar.
- Click the Export tab at the top of the page.
- Choose Custom for control, or Quick for a one-click download of the whole database.
- Set Format to SQL. Under Object creation options, tick Add DROP TABLE / VIEW / PROCEDURE / FUNCTION / TRIGGER statement – this makes the dump clean to re-import.
- Under Output, choose Save output to a file and (for big dumps) set compression to gzipped.
- Click Go. The browser downloads a
.sqlor.sql.gzfile to your local machine.
That file is functionally identical to the mysqldump output – you can restore it with the same command shown in the next section.
How to Restore the .sql Backup to Your Local MySQL
Restoring is a single command that pipes the dump file into the local mysql client. The dump file contains the SQL statements to recreate every table and row; the mysql client just executes them in order.
# Plain .sql file - pipe directly into the local server
mysql -u root -p myapp_local < ~/backups/myapp_prod_2026-09-11.sql

# Compressed .sql.gz file - decompress on the fly
gunzip -c ~/backups/myapp_prod_2026-09-11.sql.gz | mysql -u root -p myapp_local
Create the target database first if your dump did not include CREATE DATABASE:
mysql -u root -p -e "CREATE DATABASE myapp_local CHARACTER SET utf8mb4 COLLATE utf8mb4_unicode_ci;"For multi-gigabyte dumps, the import can take a long time and the mysql client may time out. Disable timeouts on the local server during the import and consider raising max_allowed_packet in my.cnf if you see ERROR 2006.
Backup Verification: How to Prove the .sql Will Restore
An untested backup is not a backup. The single biggest mistake our team sees is teams restoring a six-month-old dump and finding it corrupt. Add a verification step to your backup workflow – it costs five minutes and saves a disaster.
- Create a throwaway database on your local server:
mysql -u root -p -e "CREATE DATABASE myapp_verify;" - Restore the latest dump into it.
- Run a row-count sanity check on a few important tables:
mysql -u root -p myapp_verify -e " SELECT 'orders' AS tbl, COUNT(*) AS rows FROM orders UNION ALL SELECT 'users', COUNT(*) FROM users UNION ALL SELECT 'invoices', COUNT(*) FROM invoices;" - Compare those counts to what the live server reports. Wildly different numbers mean the dump is incomplete.
- Run
mysqlcheck --all-databases --check-upgrade --auto-repairon the restored copy to surface any corrupt tables.
If you automate backups with cron (next section), add this verification step at the end of the same script. A daily email that says “verified OK” is worth more than a hundred silent .sql.gz files.
Automating Remote MySQL Backups With Cron and Task Scheduler
Manual backups stop happening the moment you forget. Schedule them.
Linux and macOS cron Job
Drop this into your user crontab with crontab -e. It runs the all-in-one script from Method 2 every night at 02:30, then prunes anything older than 14 days.
# m h dom mon dow command
30 2 * * * /home/youruser/bin/backup_remote_mysql.sh >> /home/youruser/backups/backup.log 2>&1
30 3 * * * find /home/youruser/backups -name "*.sql.gz" -mtime +14 -delete
The two-step split (backup at 02:30, cleanup at 03:30) means a slow dump never blocks the cleanup, and a fast cleanup never races the backup.
Windows Task Scheduler
Open Task Scheduler and create a basic task that runs daily. For the action, use mysqldump directly (no SSH tunnel assumed):
# PowerShell-friendly equivalent of the cron command
$timestamp = Get-Date -Format "yyyy-MM-dd_HHmmss"
mysqldump -h db.example.com -P 3306 -u backup_user `
  --single-transaction myapp_prod `
  | & "C:Program Files7-Zip7z.exe" a -tgzip -mx=9 -si -so `
      "$env:USERPROFILEbackupsmyapp_prod_$timestamp.sql.gz"

# Delete backups older than 14 days
Get-ChildItem "$env:USERPROFILEbackups*.sql.gz" |
  Where-Object { $_.LastWriteTime -lt (Get-Date).AddDays(-14) } |
  Remove-Item
The 7z a -tgzip -mx=9 -si -so invocation takes mysqldump’s stdout on stdin (-si) and writes gzipped output to stdout (-so), which PowerShell’s pipe operator redirects to a file. Same pattern as bash, different tooling.
Upload to S3 or Google Cloud Storage After the Dump
A backup that lives only on your laptop is one laptop failure away from gone. Push the finished file to object storage the moment the dump finishes:
# Add to the end of backup_remote_mysql.sh
aws s3 cp "$BACKUP_DIR/${DB_NAME}_${TIMESTAMP}.sql.gz"
  "s3://my-db-backups/${DB_NAME}/${TIMESTAMP}.sql.gz"
  --storage-class STANDARD_IA

# Or with gsutil for Google Cloud Storage
gsutil cp "$BACKUP_DIR/${DB_NAME}_${TIMESTAMP}.sql.gz"
  "gs://my-db-backups/${DB_NAME}/${TIMESTAMP}.sql.gz"
This adds seconds to the script and turns the backup into a true off-site copy – the kind that survives a laptop loss, a hosting account suspension, and most forms of ransomware.
Large Database Strategies (10 GB and Beyond)
mysqldump is single-threaded and processes one row at a time. On databases over 10 GB that becomes the bottleneck – dumps can take hours, the connection can drop, and the local machine can run out of disk mid-stream. Reddit’s r/linuxadmin and dba.stackexchange both recommend parallel tools when you hit that wall.
mydumper for Parallel Dumps
mydumper is a community-maintained drop-in that splits the dump across multiple threads (one per table, by default). It is dramatically faster than mysqldump on large InnoDB databases and produces the same SQL output. Install with your package manager and replace the mysqldump call:
# Parallel dump with 8 threads, gzipped output
mydumper --host=db.example.com --user=backup_user --password
  --threads=8 --compress --outputdir=./dump_${TIMESTAMP}

# Restore the parallel dump with myloader
myloader --host=127.0.0.1 --user=root --password --directory=./dump_${TIMESTAMP}
Percona XtraBackup for Hot Physical Backups
For very large databases (think 50 GB to 1 TB+), physical backups are far faster than logical dumps. Percona XtraBackup copies the underlying InnoDB files while the server is running, then prepares them for restore. The trade-off is that the backup is binary, not SQL, so it can only be restored to a compatible MySQL/MariaDB version – it is not portable to PostgreSQL or for editing.
Splitting a Dump Across Multiple Files
If you must stay with mysqldump, dump each table to its own file in parallel using GNU Parallel:
# Dump each table on the remote host to its own file
mysql -h db.example.com -u backup_user -p -BNe
  "SELECT TABLE_NAME FROM information_schema.TABLES WHERE TABLE_SCHEMA='myapp_prod';"
  | parallel -j 8 "mysqldump -h db.example.com -u backup_user -p
      --single-transaction myapp_prod {} | gzip -9 > ~/backups/{}.sql.gz"
This is not as fast as mydumper, but it stays within the standard mysql client tooling and makes it easy to restore a single table without touching the rest.
Troubleshooting Common Errors
Most backup errors fall into a handful of patterns. Match the message in the table below to your situation; the fix column tells you what to try first.
| Error | Likely cause | Fix |
|---|---|---|
ERROR 1045 (28000): Access denied for user 'backup_user'@'your.ip' | Wrong password, or user not allowed from your IP | Reset the password, then run CREATE USER ...@'your.ip' IDENTIFIED BY ...; and grant privileges on the remote server |
ERROR 2003 (HY000): Can't connect to MySQL server on 'db.example.com' (110) | Port 3306 is firewalled or wrong | Use Method 2 (SSH tunnel); confirm the port with your hosting provider |
Host 'your.ip' is not allowed to connect to this MySQL server | MySQL user host pattern does not match your IP | Run SELECT user, host FROM mysql.user; on the server and update the user to allow your IP |
ERROR 2013 (HY000): Lost connection to MySQL server during query | Network timeout or dump too large for max_allowed_packet | Add --max_allowed_packet=512M to the mysqldump command, or use mydumper for parallelism |
mysqldump: Got error: 1044: Access denied for user ... when using LOCK TABLES | User lacks LOCK TABLES privilege | Add --single-transaction (InnoDB only), or grant LOCK TABLES |
Frequently Asked Questions
How can I connect to a MySQL database remotely?
You need four pieces of information: the remote hostname or IP, the MySQL port (3306 by default), a MySQL user that has SELECT on the database you want to back up, and that user’s password. Test the connection from your local machine with mysql -h hostname -P 3306 -u username -p -e u0022SHOW DATABASES;u0022. If that fails with u0022Access deniedu0022, reset the password or update the user host pattern on the server. If it fails with u0022Can’t connectu0022, the port is firewalled and you need an SSH tunnel.
How secure is a remote mysqldump run from a local computer?
Direct mysqldump over the public internet is only as safe as the channel it travels on. Without TLS, the dump data – including user passwords, email addresses, and business records – is in cleartext. If you must connect directly, require TLS with CREATE USER … REQUIRE SSL and pass u002du002dssl-mode=REQUIRED to mysqldump. SSH tunneling (Method 2 in this guide) is safer because the entire mysqldump session is inside an encrypted SSH connection, and port 3306 stays closed to the internet.
What is the easiest way to get a copy of a remote MySQL database?
The easiest method is mysqldump with the -h flag, run from your local machine: mysqldump -h db.example.com -u user -p u002du002dsingle-transaction dbname u0026gt; local.sql. If the server blocks port 3306, open an SSH tunnel with ssh -L 3307:127.0.0.1:3306 [email protected] -N and connect to localhost:3307 instead. For managed hosts with no shell access, use phpMyAdmin’s Export tab.
How do I backup a MySQL database on another remote server?
If the second server is reachable over SSH, the same SSH-tunnel method works: open a tunnel from your local machine to the second server, then run mysqldump through that tunnel. If the second server is reachable on port 3306 directly, use mysqldump -h second-server -u user -p u002du002dsingle-transaction dbname u0026gt; local.sql. For automated nightly dumps of multiple servers, run the backup script once per server, each with its own SSH config block and timestamped output directory.
How do I dump an 80 GB MySQL database?
Plain mysqldump will struggle on databases over 50 GB because it is single-threaded. Use mydumper instead, which splits the dump across multiple threads and is typically 5 to 10x faster on large InnoDB tables. For very large databases (200 GB+), switch to Percona XtraBackup, which makes a hot physical copy of the InnoDB files while the server stays online. Always pipe through gzip and stream to object storage so a multi-hour dump does not fill your local disk.
Wrapping Up
You now have three working ways to backup a remote MySQL database to your local machine, plus the scripts to automate them and a verification step that proves the dump will restore. The path our team recommends for any production server is Method 2 with SSH keys and a nightly cron job – it is secure, it survives port changes, and the all-in-one script is short enough to fit on one screen.
Pick the method that matches your access, schedule it before you forget, and verify the first restore by hand. Once you have a green nightly backup pushing to S3, the next problem on your list is the one you actually want to be working on.